Photographing coins for insurance or sale records means capturing sharp, well-lit, true-color images of both sides plus any edge lettering, mint marks, or damage, alongside a photo of any grading label, all shot against a plain neutral background with something for scale. The goal is documentation an insurer, appraiser, or buyer can trust — not artistic flair. A basic setup with diffused light, a steady camera, and a consistent background will get most collectors there without special equipment.
Why photograph coins at all
Good photographs serve two different but overlapping purposes. For insurance, they create a visual record that supports a claim if a coin is lost, stolen, or damaged, showing what the piece looked like and what condition it was in beforehand. For sale records, photographs document the item as it existed at the time of a transaction, which can matter for your own records, for a buyer’s due diligence, or later on if a dispute arises. If you’re building a broader paper trail for a collection, it’s worth reading about coin insurance and appraisals to understand how photographs fit alongside written appraisals and receipts.
Photographs are not a substitute for a professional appraisal or a graded coin’s paperwork. They’re a supplement — evidence that a coin existed in a particular condition at a particular time, useful whether you’re insuring a collection, preparing to sell, or simply keeping records for an estate plan.
What to capture for each coin
- Obverse and reverse, straight-on, filling most of the frame without cropping the rim.
- The edge, especially for coins with reeding, lettering, or other edge devices that matter for identification.
- Mint marks and date as a close-up detail shot if they’re small or hard to read in the full-coin image.
- Any damage, toning, or wear that’s relevant to condition — scratches, cleaning marks, environmental damage, or notable toning patterns. If you’re unsure whether a coin has been cleaned, it’s worth reviewing the signs described in how to tell if a coin has been cleaned before you photograph and describe it.
- The holder or slab label, if the coin is graded or encapsulated, showing the certification number and grade clearly.
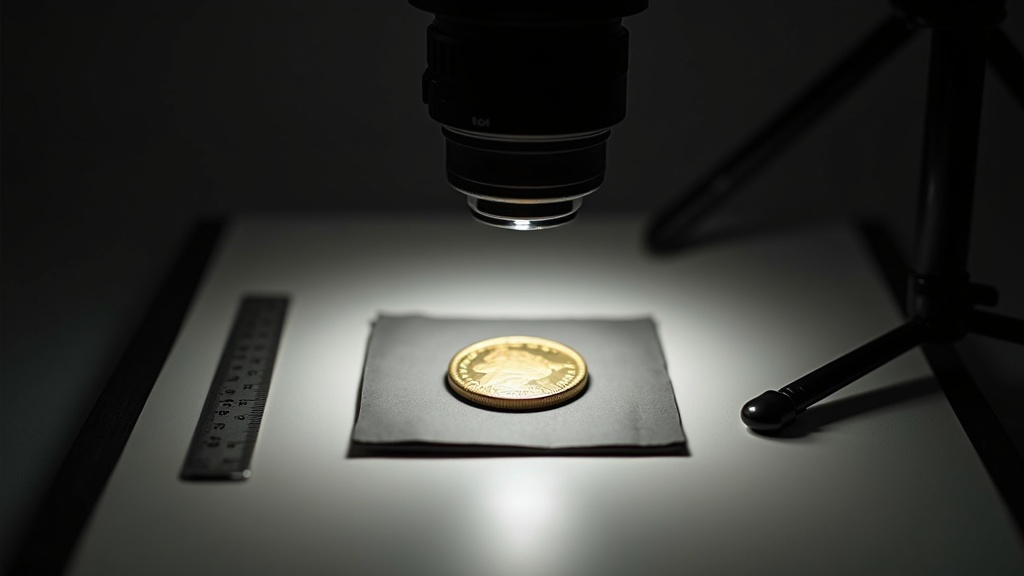
- A scale reference — a ruler, a coin of known diameter, or a small card noting the coin’s stated diameter — placed near but not touching the coin.
Setting up a simple, repeatable shoot
Lighting
Even, diffused light is more important than a fancy camera. Direct light from a single bulb or window creates harsh glare and hides detail in the recesses of a design. A basic photography light tent or two lamps bounced off white poster board on either side of the coin will diffuse light evenly and reduce hotspots. Position lights at roughly the same angle on both sides so shadows don’t obscure one part of the design.
Background and surface
Use a plain, non-reflective background — a piece of gray or black felt, a matte photography backdrop, or even a sheet of card stock works well. Avoid busy patterns, glossy surfaces, or anything with a logo or text nearby, since the goal is a clean record, not a styled photo. Keep the surface consistent across your whole collection if you’re documenting many coins, so images are easy to compare later.
Camera and focus
A smartphone camera is usually sufficient for insurance-grade documentation, provided you can get close enough to fill the frame and hold focus. Many phones have a “macro” mode or allow tapping the screen to set focus manually on the coin’s surface. If you have access to a dedicated macro lens or a camera with manual focus, use it — the extra sharpness helps when zooming in on mint marks or fine wear. Avoid digital zoom, which just crops and softens the image; move the camera physically closer instead, or crop after the fact from a high-resolution original.
Angle and consistency
Shoot straight down at the coin rather than at an angle, so the design isn’t distorted. A small tripod or a phone stand keeps the camera steady and lets you reuse the same setup for every coin, which speeds up documenting a larger collection. Consistent angle and distance also make it easier to tell later whether a coin’s condition has changed.
Avoiding common mistakes
Reflections and glare are the most frequent problem with coin photography, especially on proof surfaces or coins in capsules. Diffused, angled lighting and a slight tilt of the coin (not the camera) can reduce glare from reflective fields. If a coin is in a flip, capsule, or slab, clean fingerprints or dust off the holder first — a mark on the plastic can look like damage to the coin itself in a photo. For general handling guidance that also protects the coin during a photo session, see how to handle coins properly to avoid damage; touching a coin’s surface directly, even briefly for a photo, risks leaving oils that can affect its appearance over time.
Another common mistake is inconsistent file naming and no backup. A photo that can’t be matched to the right coin later, or that’s lost when a phone is replaced, doesn’t help anyone. Save images in a clearly labeled folder structure — by coin type, date acquired, or catalog number — and keep at least one backup copy somewhere other than the device that took the photos, such as cloud storage or an external drive.
Building a documentation record, not just a photo folder
Photographs are most useful when paired with basic written information: the coin’s type, date, mint mark, any grading service certification number, purchase date, and purchase source if known. If a coin came with a certificate of authenticity, keep in mind that such certificates have real limits on what they actually prove, and a photograph of the certificate alongside the coin is still just documentation, not a substitute for verification. Understanding those limits is covered in certificates of authenticity: what they really prove.
If you’re organizing a whole collection — for insurance, for a future sale, or because you’ve inherited coins and need to sort out what you have — it helps to work through the process methodically rather than photographing at random. The general steps in how to prepare a coin collection for sale or appraisal apply just as well to insurance documentation, since both start with knowing exactly what you own and having a clear image and description of each piece. For graded coins specifically, cross-reference your photos against the paperwork described in what documentation should come with a graded coin, so your own photo record and the certification history match up.
Store your photo files the way you’d store the coins themselves — with some redundancy and away from a single point of failure. The same principles that protect physical coins from environmental damage, discussed in the site’s care and storage archive, are worth applying to digital records too: avoid a single copy on a single device, and periodically check that files are still readable.
When photographs aren’t enough
For high-value coins, insurers and buyers may want more than photographs — a written appraisal from a qualified, independent source, or a grading service’s certification, carries more weight for establishing condition and authenticity. Photographs support that documentation; they don’t replace it. If you’re preparing coins for sale, browsing the buying and selling section can help you understand what additional records buyers commonly expect, from provenance notes to dealer receipts. And if anyone pressures you to skip documentation, rush a sale, or accept a valuation without independent verification, treat that as a signal to slow down and seek a second opinion before proceeding.
Frequently asked questions about photographing coins
What’s the best way to photograph a coin with my phone?
Use diffused, even lighting, hold the phone steady or use a small tripod, tap the screen to focus on the coin’s surface, and shoot straight down against a plain background. Avoid digital zoom; move closer instead and crop the high-resolution image afterward if needed.
Do I need a special camera to document coins for insurance?
No. A smartphone with a macro or close-focus mode is usually sufficient for insurance documentation, as long as the images are sharp, well-lit, and show both sides of the coin plus any relevant details like the edge or a grading label.
Should I photograph the coin in its holder or take it out?
Photograph graded or encapsulated coins in their holder, including the label, since removing a coin from a slab can affect its certification. For raw coins in flips or capsules, photograph through clean, dust-free plastic rather than handling the coin directly.
How many photos should I take per coin?
At minimum, capture the obverse, the reverse, and the edge if it has lettering or reeding, plus a close-up of the date and mint mark. Add photos of any damage, toning, or the grading label if applicable, so the record reflects the coin’s actual condition.
Can photos alone prove a coin’s value for an insurance claim?
Photographs support a claim by documenting the coin’s appearance and condition, but insurers typically also want a written appraisal, purchase receipt, or grading certification to establish value and authenticity — photos are one part of a broader documentation record, not a stand-alone valuation.
Gold Coins Today publishes general information about coin collecting and precious metals, not financial, investment, tax or legal advice. We are writers and editors, not certified numismatists, appraisers, financial advisors or dealers. Coin and bullion values change constantly and depend on condition, authenticity and the current market — get a current appraisal or spot price from a qualified, reputable source before buying or selling, and consult a licensed financial advisor before treating precious metals as part of an investment strategy.